
Are you tired of cluttered bookshelves that don’t quite fit your style or needs? Look no further! In this DIY guide, we will walk you through the step-by-step process of building your very own bookshelf. With just a few tools and materials, you’ll have a custom-made piece of furniture that not only organizes your books but also adds a touch of personal charm to any room in your home.
To begin, gather all the necessary tools and materials for this project. This includes items such as a saw, drill, measuring tape, screws, wood glue, sandpaper, and paint or stain. Having everything ready before you start will ensure a smooth and efficient building process. Next, it’s time to design and measure your bookshelf. Consider the size and shape that would best suit your space and take accurate measurements to ensure a perfect fit. Don’t forget about additional features like adjustable shelves or decorative trim that can elevate the look of your bookshelf even further.
Once you have your design finalized and measurements in hand, it’s time to cut and assemble the bookshelf. Follow the instructions carefully to make clean cuts on the wood pieces and use wood glue or screws to secure them together. After assembling, don’t forget to sand down any rough edges for a polished finish. Finally, add some personality by painting or staining your bookshelf in a color that matches your decor scheme. Once it’s dry, arrange your books with care on its sturdy shelves and let them become the focal point of any room. So why wait? Let’s get started on building an amazing bookshelf that will showcase both your DIY skills and personal style!
Gather the Necessary Tools and Materials
Before starting, make sure you have all the tools and materials required to build your own bookshelf. Choosing the right type of wood for your bookshelf is crucial as it will determine the durability and aesthetic appeal of your finished project. Opt for a sturdy hardwood such as oak or maple that can withstand the weight of books without sagging or warping over time. Additionally, consider the style and color you want for your bookshelf – some woods have a natural warmth while others can be stained or painted to match your existing decor.
When it comes to using power tools for cutting and assembling, safety should always be a top priority. Familiarize yourself with each tool’s user manual before use and wear appropriate protective gear like goggles and gloves. Take extra caution when operating saws or drills to avoid accidents. Measure twice, cut once to ensure precision in creating each piece of your bookshelf.
Now that you have gathered all the necessary tools and materials, it’s time to move on to design and measure your bookshelf. By carefully planning the dimensions, you can ensure that it fits perfectly in the desired space while accommodating your collection of books.
Design and Measure Your Bookshelf
Once you have finalized the design and taken accurate measurements, you are ready to proceed with constructing your custom bookshelf. Designing your bookshelf is an important step in creating a functional and aesthetically pleasing piece of furniture. Here are some bookshelf design tips to consider:
-
Determine the purpose: Before you start designing, think about what you will be using the bookshelf for. Will it primarily hold books or will it also need space for decorative items? This will help you determine how many shelves you need and their heights.
-
Consider the dimensions: Take into account the available space in the room where you plan to place your bookshelf. Measure both the height and width of the area to ensure a perfect fit. You should also take note of any obstacles such as windows, doors, or electrical outlets that may affect the placement or size of your bookshelf.
-
Choose a style: Decide on the overall style of your bookshelf based on your personal preference and existing décor in the room. Whether it’s modern, rustic, or minimalist, make sure it complements your space harmoniously.
By following these bookshelf design tips and taking accurate measurements, you can ensure that your DIY project results in a perfect fit for your home. Now that you have designed and measured everything precisely, let’s move on to cutting and assembling the bookshelf without delay!
Cut and Assemble the Bookshelf
Now that you’ve got your design and measurements sorted, it’s time to roll up those sleeves, grab your tools, and get down to cutting and assembling the bookshelf! Start by laying out all the materials you’ll need for this step: the wooden planks for the shelves, sides, and back panel; screws or nails; a saw for cutting the wood; a drill for making holes; and a measuring tape. Make sure you have everything within reach before you begin.
To start assembling the bookshelf, begin by cutting the wooden planks according to your measurements. Use a saw with fine teeth to ensure clean cuts. Double-check each cut before moving on to avoid any mistakes. Once all the pieces are cut, lay them out on a flat surface in their proper positions. This will give you an idea of how everything fits together and allow you to make any necessary adjustments.
When it comes time to actually assemble the bookshelf, there are a few techniques that can help ensure stability and durability. One important technique is pre-drilling holes before inserting screws or nails. This will prevent splitting of the wood and make it easier to drive in the fasteners. Another tip is to use clamps or weights to hold pieces in place while attaching them together. This will help keep everything aligned properly.
Moving forward into sanding and finishing the bookshelf, remember that this step is crucial for achieving a polished look and protecting your bookshelf from wear and tear.
Sand and Finish the Bookshelf
To properly sand the wood for a smooth finish, start by using coarse grit sandpaper to remove any roughness or imperfections. Gradually move to finer grits until the surface is completely smooth. When it comes to finishing options, you have the choice of staining or painting the bookshelf. Staining allows you to enhance the natural beauty of the wood while painting offers endless color possibilities and can give a modern or rustic look depending on your preference.
How to properly sand the wood for a smooth finish
First, start by using a fine-grit sandpaper to smooth the wood and create a polished finish for your bookshelf. The key to achieving a smooth finish is to go with the grain of the wood. Sanding against the grain can leave unsightly scratches and ruin the overall look of your bookshelf. Begin by examining the wood grain closely and determine its direction. Once you have identified the grain, gently sand in long, even strokes following its path. This will help you achieve a consistent result and avoid any accidental damage to the surface.
To properly sand your bookshelf, here are five important tips:
- Use a fine-grit sandpaper (around 220 or higher) for this step as it will effectively remove any roughness without leaving deep scratches.
- Regularly check your progress by running your hand over the sanded surface. If it feels smooth to touch, move on; otherwise, continue until desired results are achieved.
- Pay extra attention to corners and edges where unevenness might be more noticeable. Sand these areas carefully to ensure an even finish throughout.
- Remember to clean off any dust or debris between sanding sessions using a soft cloth or vacuum cleaner attachment. This will prevent particles from getting stuck in the wood pores during subsequent steps.
- Finally, wipe down the entire bookshelf with a slightly damp cloth to remove any remaining dust before moving on to finishing options such as staining or painting.
By following these guidelines, you’ll be able to prepare your bookshelf’s surface effectively for further finishing options without compromising its overall appearance. So let’s explore some exciting ways you can make your bookshelf truly unique!
Options for finishing the bookshelf, such as staining or painting
Enhance the look of your bookshelf by exploring exciting options like staining or painting to give it a unique finish. When deciding between staining and painting, it’s important to consider the pros and cons of each. Staining allows you to showcase the natural beauty of the wood while adding depth and richness. It enhances the grain pattern and can create a timeless, classic look. On the other hand, painting offers endless possibilities for creativity and customization. You can choose from a wide range of colors to match your room’s decor or make a bold statement with a vibrant hue. Additionally, painting can help conceal any imperfections in the wood and provide better protection against wear and tear.
When choosing the right color for your bookshelf, think about the overall aesthetic you want to achieve in your space. If you prefer a more traditional or rustic feel, opt for warm, earthy tones such as walnut or mahogany stain. These colors add warmth and elegance to any room. For a modern or contemporary look, consider using bold paint colors like navy blue or charcoal gray that will make your bookshelf stand out as a stylish focal point. Remember to take into account the existing color scheme in your room when making this decision.
Transitioning into arranging and decorating your bookshelf is an exciting step towards completing this DIY project.
Arrange and Decorate Your Bookshelf
When arranging and decorating your bookshelf, it’s important to consider the overall aesthetic you want to achieve. A stylish bookshelf organization can not only make your space look more put together, but it can also make finding and accessing your books easier. Start by grouping similar books together, either by genre or author, and arrange them in a way that makes sense to you. Consider using bookends or decorative boxes to break up the monotony and add visual interest.
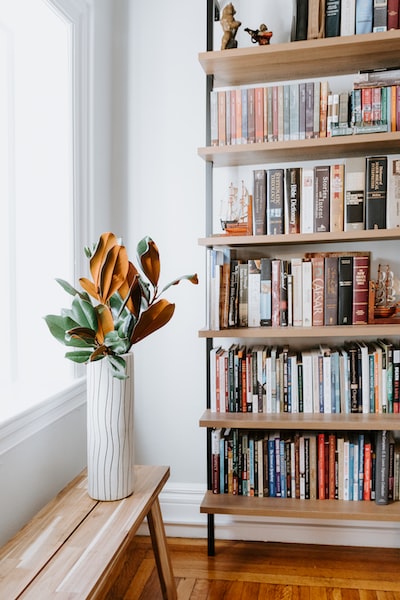
To create creative bookshelf displays, think beyond just books. Incorporate other decorative items such as small plants, framed photos, or trinkets that hold sentimental value. Mix different heights and textures to create a visually appealing arrangement. For example, place taller items like vases or candle holders on one side of the shelf and balance it out with smaller objects on the other side. Don’t be afraid to experiment with different arrangements until you find one that feels balanced and pleasing to the eye.
Lastly, don’t forget about negative space when arranging your bookshelf. Leaving some empty spaces between groups of books or decorations can give your shelf a clean and minimalistic look. It also allows for future additions without overcrowding the space. Remember that organizing and decorating your bookshelf is not a one-time task; it’s an ongoing process that can evolve over time as you acquire new books or discover new decorative pieces. Enjoy the process of curating a personalized display that reflects your style and interests while keeping functionality in mind . Rearranging and reimagining your bookshelf can be a creative outlet that allows you to showcase your favorite reads and express your personality through carefully selected trinkets, photographs, or plants.